Free Converter CSV to OFX, QFX, QBO, QIF, and Other Formats

QBO and OFX are standard formats that most accounting and tax-filing software use for importing statement line data. With Receipt Bot, you can easily convert bank statement data from CSV to OFX, QBO, or IIF formats to import it to different accounting software like QuickBooks Desktop, Peachtree, etc.

You can convert up to 1,000 statement lines to OFX for free with Receipt Bot.

This article will explain how you can convert a statement line in any CSV format to any of the following formats; OFX, QFX, QBO, QIF, etc.

Steps to import a CSV statement for conversion

Step 1 – Navigate to Bank & Card Statements page

[imageframe lightbox=”yes” gallery_id=”” lightbox_image=”https://www.receipt-bot.com/assets/video/free-converter/slide-1.JPG” style_type=”none” bordercolor=”” bordersize=”0px” borderradius=”0″ stylecolor=”” align=”center” link=”” linktarget=”_self” animation_type=”0″ animation_direction=”down” animation_speed=”0.1″ animation_offset=”” class=”” id=””]Reactivate Subscription[/imageframe]

Step 2 – Click the “Import CSV” button.

[imageframe lightbox=”yes” gallery_id=”” lightbox_image=”https://www.receipt-bot.com/assets/video/free-converter/slide-2.JPG” style_type=”none” bordercolor=”” bordersize=”0px” borderradius=”0″ stylecolor=”” align=”center” link=”” linktarget=”_self” animation_type=”0″ animation_direction=”down” animation_speed=”0.1″ animation_offset=”” class=”” id=””]Reactivate Subscription[/imageframe]

Note: The “Import CSV” button will be disabled if your processing has been paused due to insufficient credits or the trial period has ended.

Step 3 – Download the transactions import templates (based on the format of your data)

[imageframe lightbox=”yes” gallery_id=”” lightbox_image=”https://www.receipt-bot.com/assets/video/free-converter/slide-3.JPG” style_type=”none” bordercolor=”” bordersize=”0px” borderradius=”0″ stylecolor=”” align=”center” link=”” linktarget=”_self” animation_type=”0″ animation_direction=”down” animation_speed=”0.1″ animation_offset=”” class=”” id=””]Reactivate Subscription[/imageframe]

There are two formats in which you can import your transactions data

  • Option 1 – Download the CSV import template for single column

You can use this template if you have the amounts in a single column with money in as a positive amount and money out as a negative amount. The columns in this template are the following: “*Date”, “Description”, “Reference”,”*MoneyIn”, and “*MoneyOut”.

[imageframe lightbox=”yes” gallery_id=”” lightbox_image=”https://www.receipt-bot.com/assets/video/free-converter/slide-4.JPG” style_type=”none” bordercolor=”” bordersize=”0px” borderradius=”0″ stylecolor=”” align=”center” link=”” linktarget=”_self” animation_type=”0″ animation_direction=”down” animation_speed=”0.1″ animation_offset=”” class=”” id=””]Reactivate Subscription[/imageframe]

  • Option 2 – Download the CSV import template for double-column.

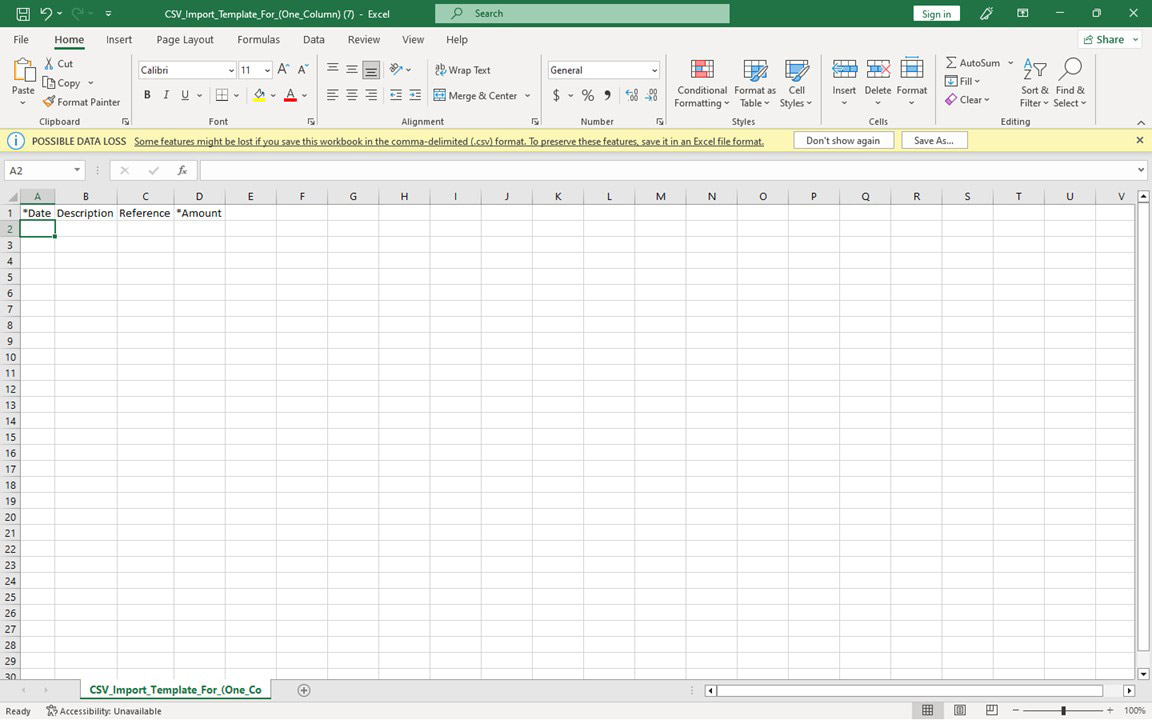
You can use this template if you have amounts in two separate columns. The columns in this template are the following: “*Date”, “Description”, “Reference” and “*Amount”

[imageframe lightbox=”yes” gallery_id=”” lightbox_image=”https://www.receipt-bot.com/assets/video/free-converter/slide-5.JPG#” style_type=”none” bordercolor=”” bordersize=”0px” borderradius=”0″ stylecolor=”” align=”center” link=”” linktarget=”_self” animation_type=”0″ animation_direction=”down” animation_speed=”0.1″ animation_offset=”” class=”” id=””]Reactivate Subscription[/imageframe]

Step 4 – Copy and paste the bank transactions into the downloaded CSV template. Please do not change the column titles.

Note: Ensure that the dates are in the “DD-MMM-YYYY” format, as it is the only format supported by Receipt Bot.

[imageframe lightbox=”yes” gallery_id=”” lightbox_image=”https://www.receipt-bot.com/assets/video/free-converter/slide-6.JPG” style_type=”none” bordercolor=”” bordersize=”0px” borderradius=”0″ stylecolor=”” align=”center” link=”” linktarget=”_self” animation_type=”0″ animation_direction=”down” animation_speed=”0.1″ animation_offset=”” class=”” id=””]Reactivate Subscription[/imageframe]

Step 5 – Click the “Browse” button and select the downloaded CSV file with data.

[imageframe lightbox=”yes” gallery_id=”” lightbox_image=”https://www.receipt-bot.com/assets/video/free-converter/slide-7.JPG” style_type=”none” bordercolor=”” bordersize=”0px” borderradius=”0″ stylecolor=”” align=”center” link=”” linktarget=”_self” animation_type=”0″ animation_direction=”down” animation_speed=”0.1″ animation_offset=”” class=”” id=””]Reactivate Subscription[/imageframe]

Step 6 – Select the payment method you want to assign to the transactions in the output file.

Note: Output formats like OFX and QBO (QuickBooks Desktop) require a payment method; therefore, it is mandatory. If you plan to download in any other format, select the payment method as “None”.

[imageframe lightbox=”yes” gallery_id=”” lightbox_image=”https://www.receipt-bot.com/assets/video/free-converter/slide-8.JPG” style_type=”none” bordercolor=”” bordersize=”0px” borderradius=”0″ stylecolor=”” align=”center” link=”” linktarget=”_self” animation_type=”0″ animation_direction=”down” animation_speed=”0.1″ animation_offset=”” class=”” id=””]Reactivate Subscription[/imageframe]

Step 7 – Enter the closing balance for the selected payment method at the last transaction date.

[imageframe lightbox=”yes” gallery_id=”” lightbox_image=”https://www.receipt-bot.com/assets/video/free-converter/slide-9.JPG” style_type=”none” bordercolor=”” bordersize=”0px” borderradius=”0″ stylecolor=”” align=”center” link=”” linktarget=”_self” animation_type=”0″ animation_direction=”down” animation_speed=”0.1″ animation_offset=”” class=”” id=””]Reactivate Subscription[/imageframe]

Step 8 – Click the “Import” button to upload your CSV file. The system will navigate you to the Bank statement detail pop-up.

[imageframe lightbox=”yes” gallery_id=”” lightbox_image=”https://www.receipt-bot.com/assets/video/free-converter/slide-10.JPG” style_type=”none” bordercolor=”” bordersize=”0px” borderradius=”0″ stylecolor=”” align=”center” link=”” linktarget=”_self” animation_type=”0″ animation_direction=”down” animation_speed=”0.1″ animation_offset=”” class=”” id=””]Reactivate Subscription[/imageframe]

Step 9 – Click the “Download” button and select the desired format to get the converted data.

[imageframe lightbox=”yes” gallery_id=”” lightbox_image=”https://www.receipt-bot.com/assets/video/free-converter/slide-11.JPG” style_type=”none” bordercolor=”” bordersize=”0px” borderradius=”0″ stylecolor=”” align=”center” link=”” linktarget=”_self” animation_type=”0″ animation_direction=”down” animation_speed=”0.1″ animation_offset=”” class=”” id=””]Reactivate Subscription[/imageframe]

Note: If you can not find your desired format in the download drop-down, click the More Formats button to view a detailed list of available formats.

[imageframe lightbox=”yes” gallery_id=”” lightbox_image=”https://www.receipt-bot.com/assets/video/free-converter/slide-12.JPG” style_type=”none” bordercolor=”” bordersize=”0px” borderradius=”0″ stylecolor=”” align=”center” link=”” linktarget=”_self” animation_type=”0″ animation_direction=”down” animation_speed=”0.1″ animation_offset=”” class=”” id=””]Reactivate Subscription[/imageframe]

You can download the data in the format of your choice by referring to the help article “Review and download bank statements”.

[imageframe lightbox=”yes” gallery_id=”” lightbox_image=”https://www.receipt-bot.com/assets/video/free-converter/slide-13.JPG” style_type=”none” bordercolor=”” bordersize=”0px” borderradius=”0″ stylecolor=”” align=”center” link=”” linktarget=”_self” animation_type=”0″ animation_direction=”down” animation_speed=”0.1″ animation_offset=”” class=”” id=””]Reactivate Subscription[/imageframe]

Note: If you cannot find your desired format in the download drop-down, click “More Formats” to view a detailed list of download formats.
Frequently Asked Questions

[accordian divider_line=”” class=”articleKB_faq” id=””]

[toggle title=”Q: How can I purchase additional credit for the current period only? ” open=”yes”]

You have the following options to get additional credits for a one-off high usage:

  • Receipt Bot can convert data into several formats. The following formats are available as output: OFX, QBO (QuickBooks Desktop), QFX, QIF, QuickBooks Online CSV, Xero CSV, Capium CSV, CCH CSV, FreeAgent CSV, IIF (QuickBooks Desktop), IRIS Accounts Production CSV, LimeBooks CSV, QuickFile CSV, Reckon One CSV, Sage Pastel CSV, SageOne CSV, VT Accounts CSV, WaveApps CSV.

[/toggle]

[toggle title=”Q: Is there a limit on how many statement lines I can convert for free using Receipt Bot?” open=”yes”]

  • Receipt Bot works on a credit-based approach. You get ten credits in the basic plan, which can be used to convert up to 1000 lines of data.
  • It costs a minimum of three credits per batch of statements. Pro tip: Ensure the transaction batch has more than 300 lines to avoid credit waste.

[/toggle]

[toggle title=”Q: Can I convert csv to OFX from multiple banks or financial institutions using Receipt Bot?” open=”yes”]

  • Yes, Receipt Bot can convert data for any financial institute.

[/toggle]

[toggle title=”Q: What should I do if the Import CSV button is disabled?” open=”yes”]

  • The Import CSV button is disabled when your processing has been paused. You need to upgrade or renew your subscription to get additional credits.

[/toggle]

[toggle title=”Q: How can I assign a specific payment method to the transactions in the output file?” open=”yes”]

  • If the payment method already exists in the Receipt Bot, select it when uploading the CSV file or from the statement details pop-up.

If the payment method does not exist, you can add a new payment method from the bank & card statement page.

[/toggle]

[toggle title=”Q: Is it necessary to enter the closing balance for the selected payment method? What if I don’t know the closing balance?” open=”yes”]

  • It is mandatory to enter the closing balance as it is used in some output formats like OFX and QBO (QuickBooks Desktop).

You can set the value as 0 if you do not plan to download data in these formats.

[/toggle]

[toggle title=”Q: How can I access additional output formats like QIF, QFX or IIF if the desired format is not in the download drop-down?” open=”yes”]

  • You can click the “More Formats” button for a detailed list of available formats.

Alternatively, you can create a custom CSV-based format using the “Custom Format” option.

[/toggle]

[toggle title=”Q: Can I use Receipt Bot to convert credit card statements files from CSV to OFX?” open=”yes”]

  • Receipt Bot can convert Credit Card Statements, Paypal Statements, Mortgage/Loan statements, etc.

[/toggle]

[/accordian]

Related Articles

Review and download bank statements

Upload Data from PDF Bank Statements to QuickBooks Desktop

Design Custom CSV/Excel format to download PDF bank statements data

Go to Top