Overview of Receipt Bot navigation
As part of Receipt Bot user experience design, we wanted to make the application user-friendly and intuitive despite being feature-rich. That required a balance between simplicity and easy availability of the right tools and options to the users. This article discusses the User Interface (UI) objects and how you can access different app features.
Receipt Bot application has three main objects that determine the access and data that you see:
- Organization (Practice or Account): When you create an account and add the first business, an organization is created in the background, also referred to as Practice. All billing and account management is handled at the organization level.
- Business: A business, person, organization, or entrepreneur, for whom accounting is being performed. One organization can have multiple businesses. Accountants and bookkeepers usually create a business for each of their clients. Some users use this feature to keep personal, and business expenses separate, or to manage expenses of different branches or locations separately.
- User: A user account, associated with an email and used as the user ID for login. A user can have access to multiple organization or businesses.
In the following sections, we discuss navigation to different pages and features;
Business Bookkeeping App
Upon logging in to Receipt Bot, you are navigated to the Business Dashboard screen of Bookkeeping App. If you have more than one business then upon login, you are navigated to the business you accessed before your last log out.
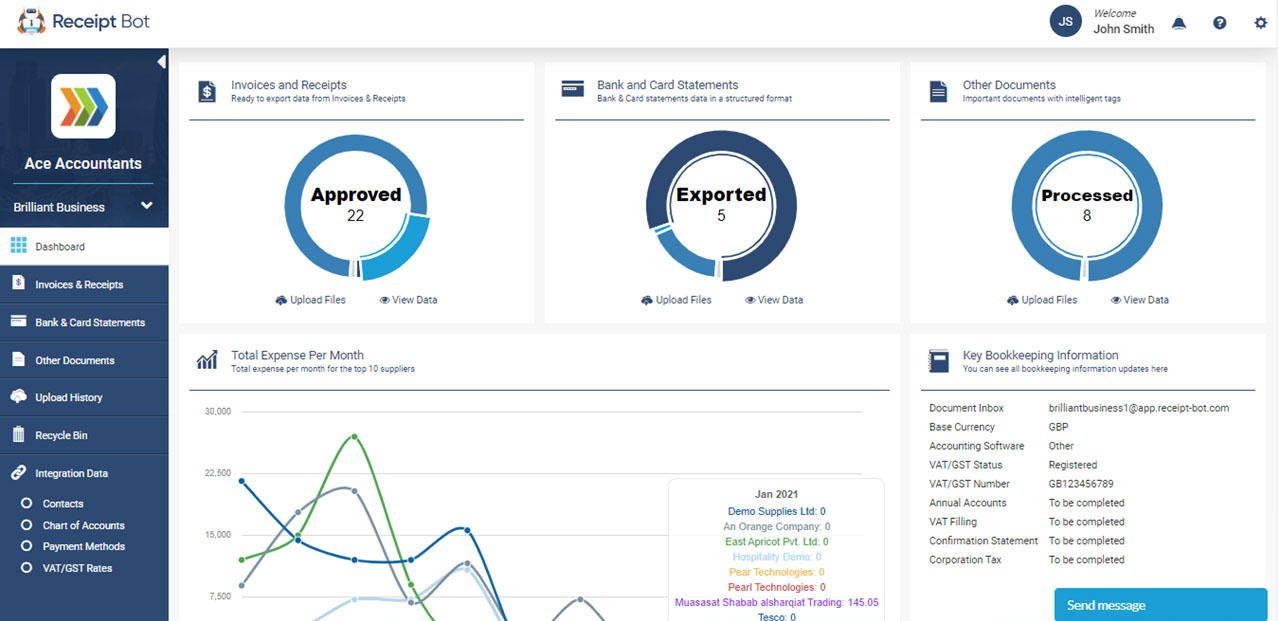
Business Bookkeeping Dashboard
This page gives a bird’s eye view of business bookkeeping activities, the number of documents in process for each document type, a trend of expenses for top ten suppliers and important bookkeeping deadlines. The bookkeeping information tile at the bottom right corner provides a quick view of crucial bookkeeping information such as base currency, document inbox and VAT status.

On the left-hand side of the business view, you see the Business Navigation Menu, with the following objects;
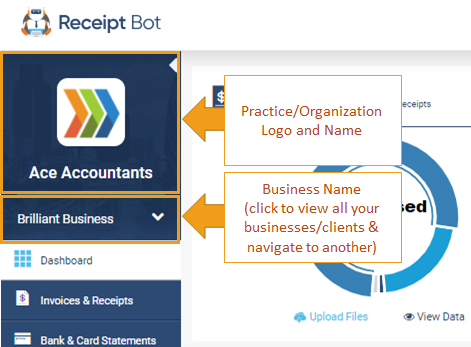
Organization Logo and Name: Here you see the logo and name of your organization (Practice).
Business Name: Under the organization name, you find the business name that is currently active.
You can click on the business name to see a list of five recently accessed businesses and then click on “Show More >>” to see a list of all the businesses in an expanded business list.
links to different modules enabling users to navigate.

Business Navigation Menu
Business Navigation Menu enlists the links to different modules enabling users to navigate and view documents and functions in each module;
Invoices and Receipts: Expense invoices and receipts uploaded by the users.
Bank and Card Statements: It lists out all bank statements uploaded by users for data extraction.
Other Documents: Shows the documents that were uploaded to Receipt Bot but were not recognized or processed as invoice, receipt or bank statement. If you have uploaded a mix of documents, please review this screen to ensure all documents are classified correctly.
Upload History: Shows all the documents that were uploaded to Receipt Bot along with the status and classification of each document. As all the documents in Receipt Bot are assigned a unique ID, this page enlists all documents in a sequence by ID.
Recycle Bin: Shows all the deleted documents. Users can restore deleted documents from here if required.
Integration Data: Navigates to the Integration settings page, allowing users to review the integration status, connect with accounting software (such as Xero or Quickbooks Online) or disconnect an existing integration.
Contacts: Enlists all the suppliers and customers of a business along with options to add, amend or remove the records.
Chart of Accounts: Accounting categories with options to add, amend or remove.
Payment Methods: A list of bank accounts, credit cards and any other payment methods.
VAT/GST Rates: Status of VAT registration and list of applicable tax rates.

Title Bar
Title bar appears at the top of every page, with the following key icons;

User Initials

User Name

Notifications

Link to help articles in the Knowledge Base

Settings Menu

Setting Menu (Gear Icon)
This menu provides navigation to log out button and the following application pages;
Practice Management: Navigates to the Practice Management Module.
Business Profile: Maintain essential business information, bookkeeping deadlines and users’ access to the business.
Add New Business: In Receipt Bot, you can add multiple businesses in a single account. Use this option to add a new business.
User Profile: On this page, you maintain your name, email address and change password.
Subscription & Billing: This option navigates you to the billing page. Here you can view your billing and credits usage history, credits available for document processing and an estimate of the credits required for documents in process.
![]()
Practice Management Module
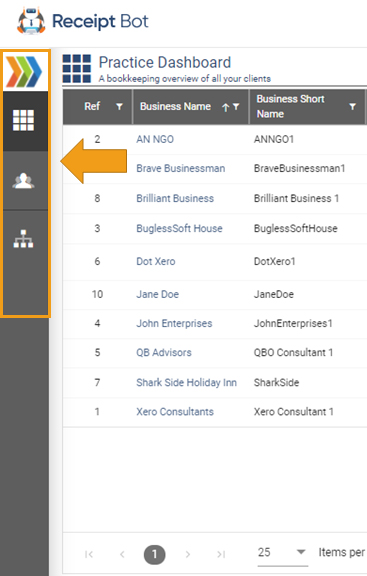
Practice Management Module includes practice management dashboard, practice staff access page and practice profile page.
Practice Navigation Menu
In the practice management module, the Business Navigation Menu is replaced by the Practice Navigation Menu, giving you access to the following pages:
Practice Dashboard: An overview of the bookkeeping status all your clients (businesses) and their respective filing deadlines.
Practice Staff: Manage access of the practice users with access to all or some of your clients.
Practice Profile: Customize practice name, logo and update practice information.
