Maintain business profile
All documents and data in Receipt Bot are uploaded and recorded in a “business”. Though, from a user perspective, you do not need to have a ‘Registered Business’ as such to get started with bookkeeping automation; it is a broad term for a person, business, company, department, partnership or charity to whom the invoices and bank or card statements are addressed.
You provided this information when you created the business. Should you need to change any of the business records, you can do that on the business profile screen in three easy steps.
Step 1: Navigate to Business Profile Page
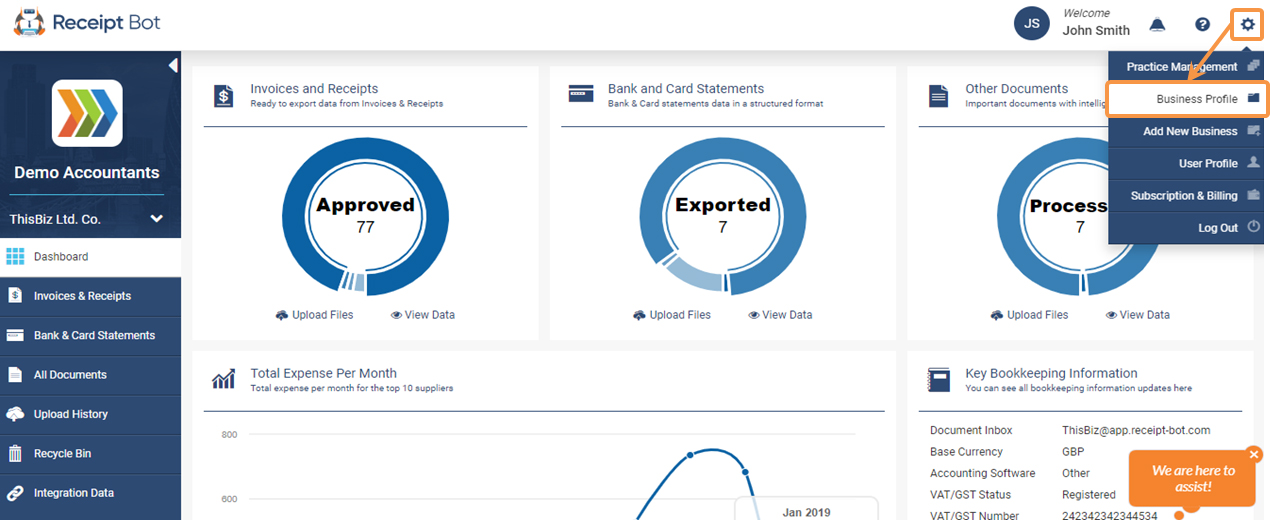
In Receipt Bot app, click on the gear icon at the top right corner of the screen and select the Business Profile option from the menu.

Step 2: Update the Information
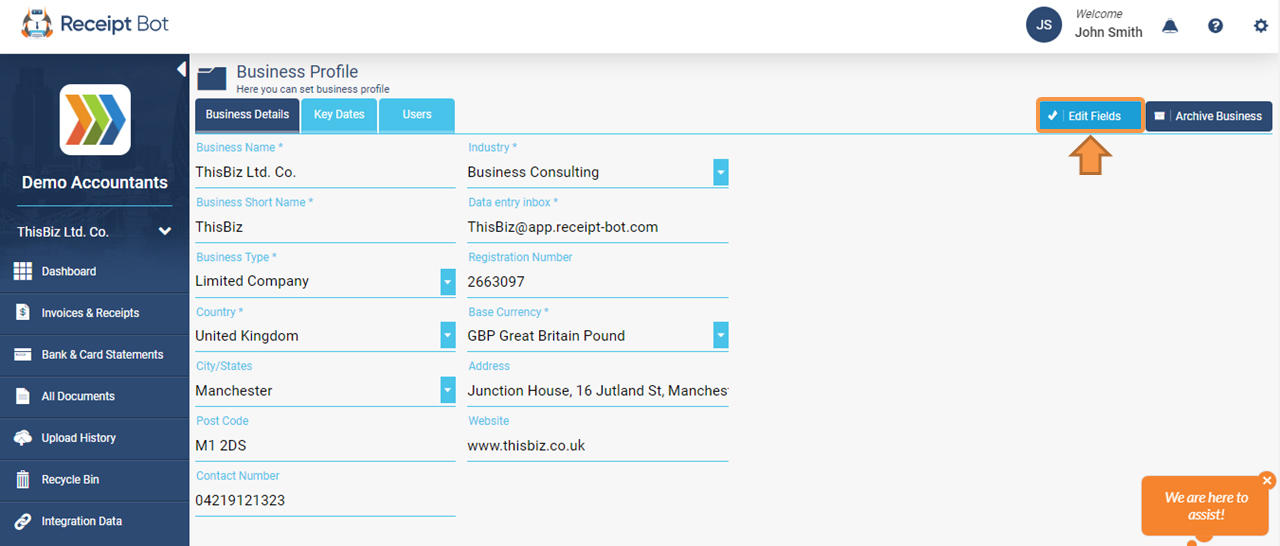
On the Business Profile page (Business Details Tab), you will see the business details that you provided when you added the business such as Name, Industry, Short name and Registration. These fields are not editable by default, to enable editing on the page, please click on Edit Fields button.

Note: There are exceptions to this feature: the country and the base currency of a business cannot be edited, as these details are connected with the previous transactions and VAT rates. If these details have changed for your business, please create a new business or contact the support team via application chat.
Below are the brief descriptions of the fields:
- Business Name: as it appears on invoices, bank and card statements. To avoid duplication, you cannot add two business with the same name in one account.
- Industry: The industry which best describes the nature of business.
- Short Name: Short name is mainly used to create document inbox for emailing the invoices and statements, and it is unique across the system. (Just like you cannot have two Gmail accounts with the same ID). So you might get a ‘Name already taken’ error.
- Document Inbox: Auto-completed based on the short name, your documents inbox.
- Business type: Select from one of the standard business type options.
- Contact Number (Optional): If you like us to contact you via phone for any support matters, please provide a phone number. (We do not share this information with anyone).
- Country: The country where the business is registered or based.
- Base Currency: You business currency, auto-completed based on country but can be updated. Invoices/receipts in other currencies will be translated to this currency. If your accounting software uses a different currency, then your document exports will not work.
- City/State (Optional): It is helpful to have if there are State-specific VAT/Tax information on documents.
Note: It is recommended that the short name is not updated, as it can impact your auto-forward settings. Should you need to change the short name, please remember to update the auto-forward set-up and your email address book and autofill with the new inbox address.
Step 3: Save the Updates
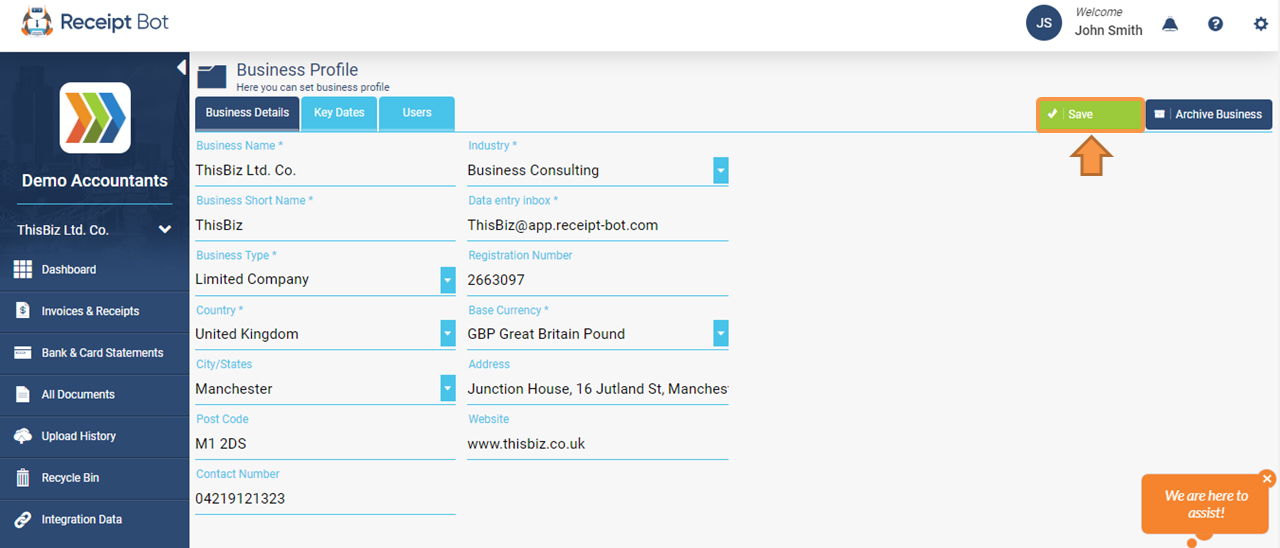
Once you have updated the required fields, click on the Save button. If there is a need to edit again in the future, you can do so by going through the same steps.

Next Steps
In addition to business profile changes, you can perform the following additional actions on the business profile page:
Manage key business dates and deadlines