Auto-forward emails for document recording
Recording your expenses and revenues from vendors and customers can be a hectic task, but you can automate data entry to your accounting software through the Receipt Bot Email Auto forwarding feature.
When you create a new business in Receipt Bot, the system creates an email address for your business with the following name “your_business_short_name@app.receipt-bot.com”. This email address is unique for each of your businesses. Any business documents you receive by email can be forwarded to this email address, and they will be uploaded to your Receipt Bot business. Once the documents are uploaded to Receipt Bot, they will be queued for data extraction. After the data extraction is complete, you can easily export this data to your accounting software. Receipt Bot extracts data from the email body as well as from the attachments if they are in supported formats. (Following are the supported formats: PDF, JPEG, JPG, TIFF, PNG)
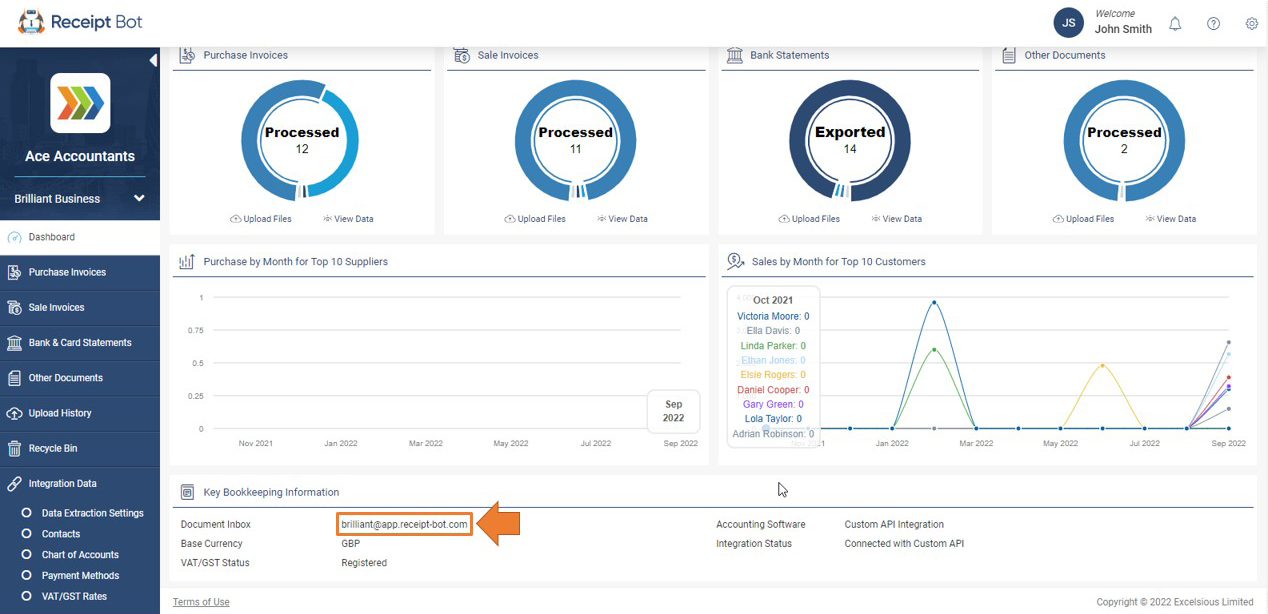
You can find your unique document inbox email on the business dashboard screen of Receipt Bot.
Setting up auto-forward on your email account
You can turn on the auto-forward from your Gmail account to forward your document. Filters can be applied based on body or subject to forward only relevant data.
Following are the steps for enabling the Receipt Bot Auto forward feature:
Step 1 – From business dashboard, navigate to “Key Bookkeeping information” Section and copy the document inbox.
Step 2 – Go to your Gmail account and click on the Setting icon from the top right and click on “See all settings”
Step 3 – Navigate to “Forwarding and POP/MAP”, click on “Add forwarding address” and paste the document inbox copied from Receipt Bot and click on Proceed button in the Confirmation Pop-up.
Step 4 – Go back to the Receipt Bot app and navigate to the Document Management page. Find the confirmation code from Google.
Step 5 – Download the confirmation code email and copy the code from it.
Step 6 – Navigate to your Gmail account, paste the confirmation code and click on verify button
Note: If you did not receive the auto-forwarding confirmation code, contact Receipt Bot support team.
You have successfully enabled the Receipt Bot auto-forwarding email feature and now Receipt Bot will receive all your emails and try to extract data from them.
The issue with this approach is that forwarding all emails can result in unnecessary documents being received and processed which results in unnecessary usage of credits on your account.
Apply Forwarding filters in your Email
To make sure only relevant emails are forwarded to Receipt Bot you need to add a criteria on your Gmail account so that only the emails that matched the criteria are forwarded to your Receipt Bot business.
Follow these steps to add forwarding filters:
Step 1 – From the filters and blocked addresses section in the Gmail settings, create a new filter.
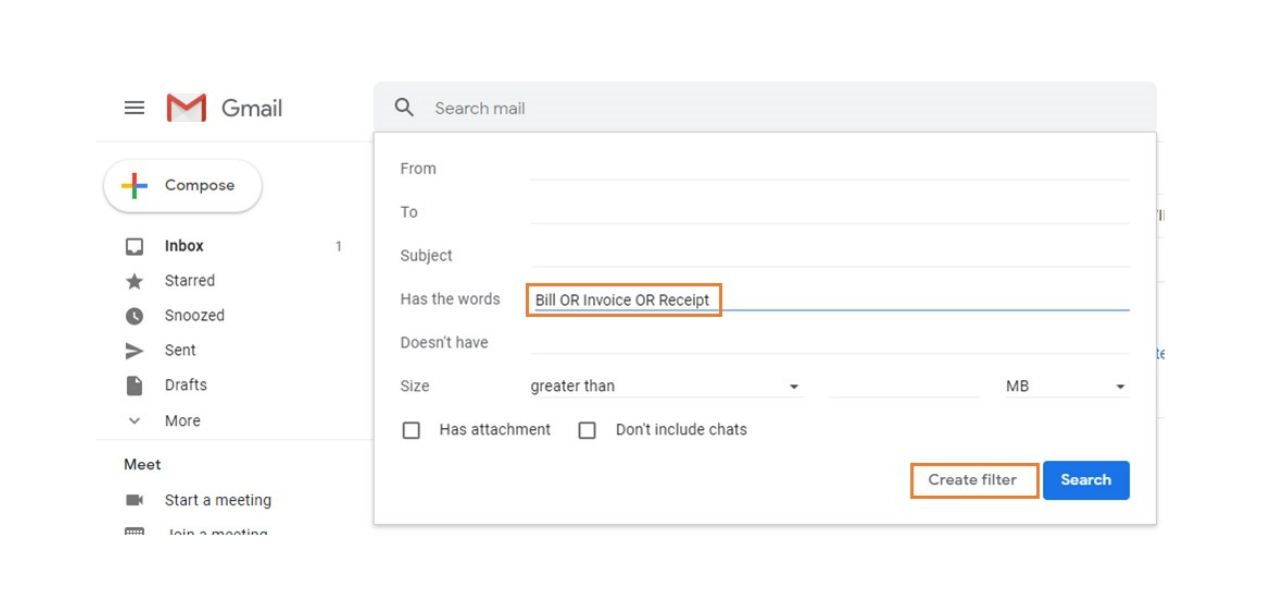
Step 2 – Apply filters based on keywords in the email body or subject or sender address. Click on create filter button.
Pro-tip: When using more than one keyword make use of the command “OR” between each keyword.
In the example below, any emails with the keywords bill OR invoice OR receipt in the body of the email will be automatically forwarded. If you want to forward bills only from specific vendors, you can add those FROM field.
Step 3 – On the next screen, select “Forward it to: yourbusiness@app.receipt-bot.com” and click create filter.
Pro-tip: Select “Apply the Label” and add a label “Receipt Bot”. This will help you identify the emails that get forwarded to Receipt Bot.
Congratulations! You successfully have set up auto-forwarding in Receipt Bot. Now all the incoming emails that match your filter criteria will be forwarded to your Receipt Bot inbox and will be recorded as a transaction in Receipt Bot.
Receipt Bot auto-forward to a specific module
By default, Receipt Bot will upload the document as a Purchase Invoice and its auto-classification feature will re-classify the document if required to the relevant module.
You can apply your own settings by adding specific key words in the email subject so that documents are uploaded to the relevant module.
- If the email subject contains the term “Revenue” then the document will be uploaded to Receipt Bot in the “Sales Invoice” Module.
- If the email subject contains the term “Bank Statement” or “Card Statement” then the document will be uploaded to the Receipt Bot “Bank & Card Statement” Module.
Limitations of the email forwarding feature
Receipt Bot can only read documents that are in the email body or forwarded as a direct attachment. It cannot download documents from links that are present in the email.
The system cannot read documents that are password protected so please remove the password to upload such documents else the document will be sent back as a reply to the user who sent the email or to the account owner.
The Auto-forwarding feature will only apply to your future incoming emails. For any past emails that you need to upload, please manually select the specific emails, and forward them to your Receipt Bot document inbox.
Related Articles
Auto-export to accounting software